Showing posts with label party. Show all posts

Thursday, 22 December 2011

Dolls Christmas party :3 + Free Blythe Cracker hat pattern!

Hello everyone!

It has been a very fun day today :) Candy and Catherine had a special Pre-Christmas party today with thier newest friend Penny (A tangkou doll I bought on Ebay :) They chatted lots and drunk quite alot of orange juice too! For this special occasion I made them all some Christmas cracker/party hats, they liked them alot. Hehehe here is a shot I got of them all in deep discussion about how Candy keeps her hair so pink, lol!:


I thought I would give away the hat Pattern free just in case there are any other Blythes anywhere in need of party hats :0D

Here it is....

You will need:
  • A pair of 3.25mm needles
  • DK yarn in any colour you want (the better quality/slightly thicker the better as this stretches less when ironing flat)
  • A darning needle
  • A pair of scissors
  • And an iron (or you can block your piece)
Party hat pattern:
(Avoid knitting too loosely as this could lead to hat being too big)

Cast on 66 sts
Row 1-7: Stst 7 rows beginning with a K row
Row 8: In P, cast off 1 st at each end and work purl over rest of sts (64 sts)
*Row 9: K8, then working on these sts only (leaving rest of sts on needle) work first point:
(P across on all even rows)
Row 11: K2tog, K4, K2tog (6 sts)
Row 13: K2tog, K2, K2tog (4 sts)
Row 15: K2tog twice (2 sts)
Row 17: K2tog (1st)
Then fasten off for first point*

Rejoin yarn and work from * to * to work next point and then following remaining 6 points (8 points in total)

Making up:

Darn in all loose ends leaving just cast on thread for sewing up hat later. Then carefully iron hat piece to flatten slightly, avoid ironing the piece heavily as this will flatten it too much causing the hat to be too large. Alternatively you can block the piece to flatten, this takes longer but it you do not stretch piece too much this does reduce chance of hat being too big. (elastic can be sewn in to hat if this does happen anyway :) Then finally mattress stitch two end edges of crown together. You can then add any decorations you want :0)

All done!


I hope you like the pattern and I hope it enhances some other Blythe/doll parties! :0P

See you all very soon,

It's not long till Christmas now, I can't wait! 

Bye!! xxx

Abbreviations:
st(s) = Stitch(es)
K = Knit
P = Purl
K2tog = Knit two stitches together
Stst = Stocking stitch

Friday, 9 December 2011

Quirky is Finished!

Hello everyone,

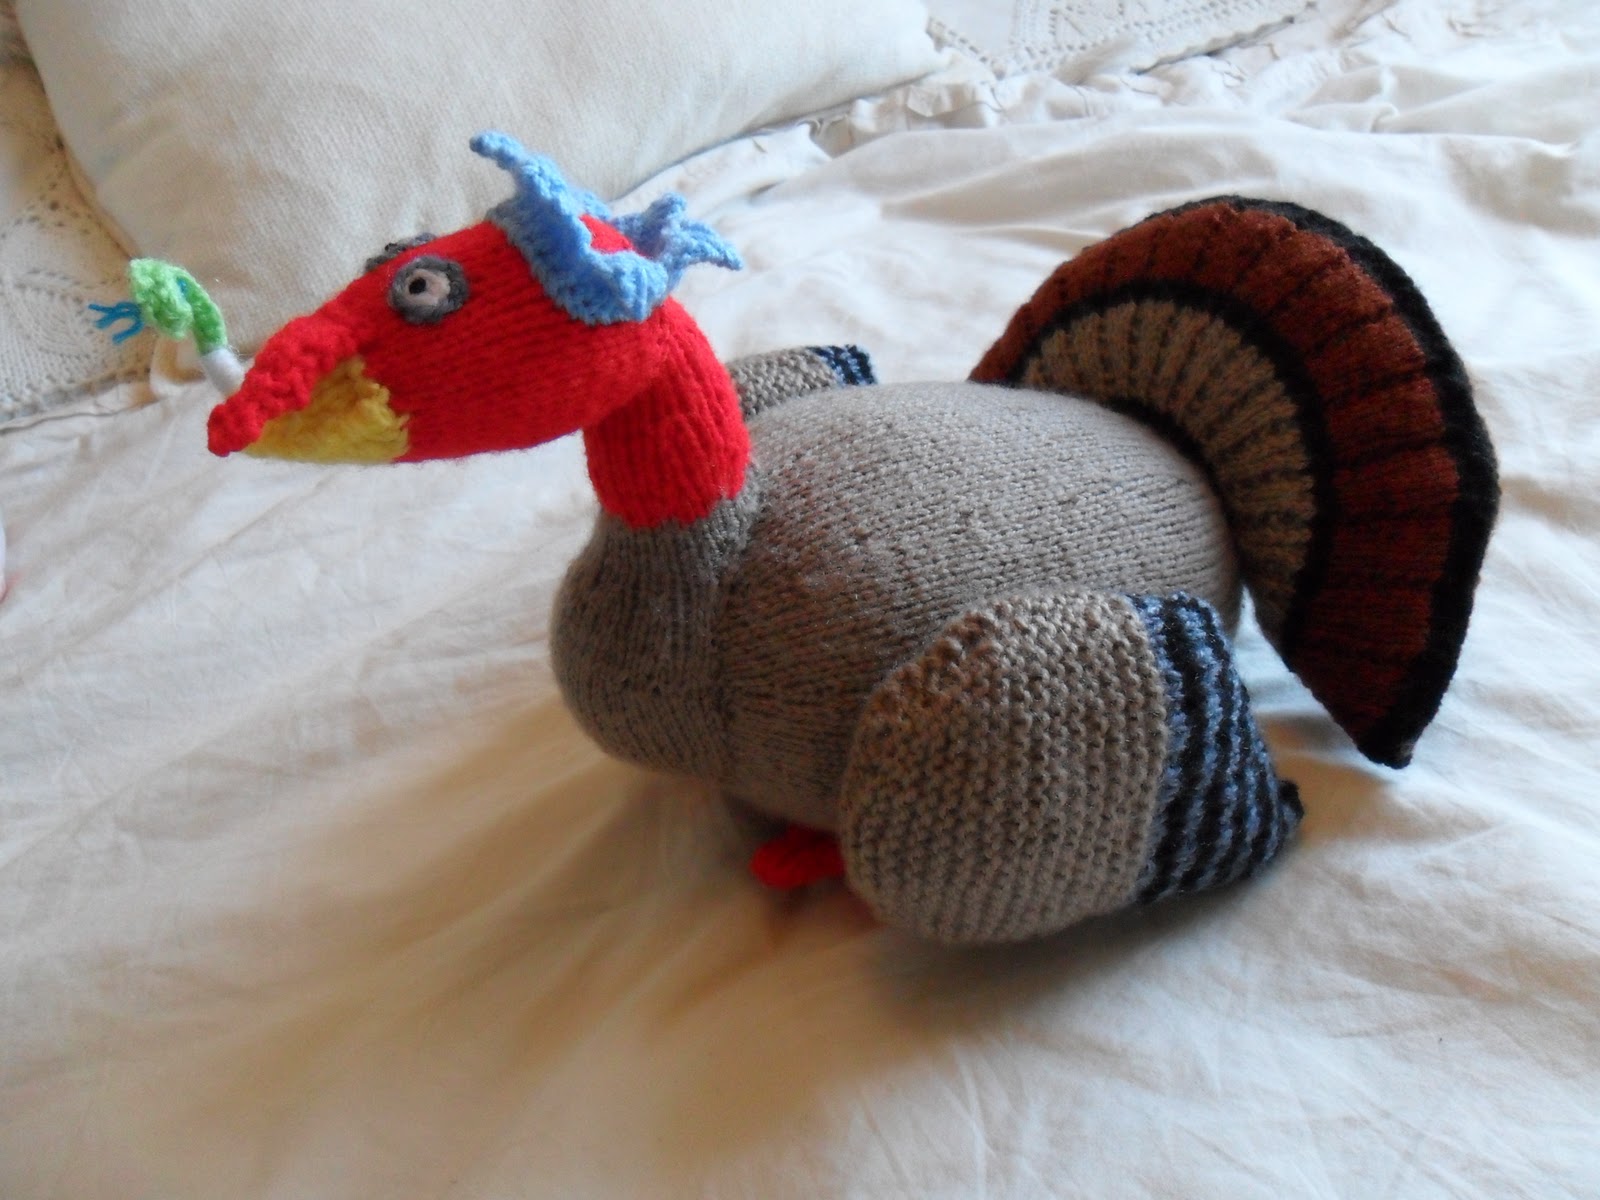
I am very happy as yesterday I completed Quirky, feathers, feet and all! Just in time for when we have some family friends coming on the 11th of December (my target day for finishing),

Here he is in all his turkey glory :0):


The feet were so fiddly but I got there in the end, I think this is the largest/most detailed toy project I have ever done.
 It is so amazing to look in the magazine at the picture and then look at Quirky and think; 'I didn't buy that I made it!'  That is why I love making things :D

Quirky has lots to do this Christmas, he is the centrepiece on the 11th, guest of honor at my nans on Christmas eve, centrepiece again at mine on Christmas day and he is also celebrating New Years eve with us all too, he is ready for it though with his party hat and blower! Lol :0D

See you all again very soon,

Bye! xxxXxxx

Sunday, 11 September 2011

Lucky me!

Yolah!

It's fast approaching my birthday (woooo!) so on Friday I had a party with 3 of my friends, it was very fun, we played monopoly and had pizza :P (I also got some special Hello kitty plates to eat the pizza off of! ahhaha so cute!). One of my friends gave me my present (well actually 2) early and I couldn't resist opening them, they were calling me! My first present was a stick of rock she had got me from her trip to Brighton (in a mystery flavour!!! :D) And the other present she got me was a lovely stylish mini 4 draw storage box for me to put my crafty bits and bobs in, psychicly she must have known I was running out of storage space! :-)


... But thats not all she also put a little gift in each draw of the box! :D How lucky am I! In draw 1 she had put a few sets of beads, and very thoughtfully in the colour black so I can use them for eyes on my amigurumi (currently I have to paint brown and pink beads to get black eyes!)


In draw 2 was possibly the coolest eraser you have ever seen.... :-) A big mushroom!


My friend is so generous, I still can't believe she even filled all the draws with gifts <3 In draw 3 was something I have never, ever seen before:


Mini love hearts! I really like love hearts but I didn't even know they made mini ones so I got pretty excited, they are sooo cute :D

And last, but definitely not least, in draw 4 was a handmade paper crane chain for me to give me luck :) I love it <3 It is so pretty and it means so much that she made it for me :0) I have hung it up in my room now so I can see it everyday!


So cool! XD

Also recently my nan came round and she bought lots of ribbon she had been given by someone and she asked me if I would like it!!! There was tons of it and as many of you will know it is really expensive in craft shops so I was thrilled. Look!:


I especially love the brown dotty one and there is almost a whole roll! My brain started whirring when I saw it, thinking of all the things I could make with it. My nan also brought me round three balls of red wool, one ball of yellow wool and a knitting and crochet stitch book she had been given too, I felt spoilt :0)

And if the lovely birthday gift and crafty donations weren't enough I also was recently chosen as one of the lucky random DAL winners for the summer challenge on Ravelry! I have won some pretty mystery stitch markers which I will post about when they arrive :) I also got this badge to put on my blog, made by Alyoops herself  (the DAL group creator):


I have submitted my pictures of inspiration for this round but am currently stuck between a few different designs for my final choice to make, I think I have nearly decided though. When I have finally, definitely, chosen I will be posting my sketch for you all to see!

I hope everyone is having a nice week,
See you soon!

Au revoir :-) xxx

Monday, 11 July 2011

Sweet dinner party favours :)

Hello!
The other day my Aunty came round for dinner. My dad made a reallllllllyyyy nice meal and I made these little sweet holders :) I wrapped a fudge up in each one and put them in everybodys places as little dinner party favours :)


The pattern is my own and I'm really pleased with how they came out. I will definitely be making them again for future dinner parties! They only use up a little bit of yarn each so I was able to crochet them all from some yarn I got in a kit with a magazine. (I have soooo many little balls of yarn from magazines so its good to find a cool way to use some of them up)


The fudges I put in them were yummy too :P My brother had eaten his within 2 minutes of sitting down, Hahhaa :D

See you soon,

Bye xxx

Friday, 1 July 2011

Crochet crisp packet coaster tutorial!

Bonjour :)

I hope you all saved up some food wrappers and cardboard like I said, as today I thought I would post a tutorial on how to make a crochet crisp packet coaster!!!! You can use any food wrapper, I just first made one with a crisp packet :)


They are pretty much recycled and are quick to make and I think they look great. They come in very handy at parties as everyone can choose one, (their favourite food!!!) and there is no more problem of mixed up drinks! Make them now ready for your summer party/barbecue, you can never have to many coasters...

You will need:

  • Some cardboard e.g from old cereal boxes or birthday/Christmas etc... cards
  • Some food wrappers (about crisp packet size)
  • A pen
  • Glue
  • Scissors
  • Ruler
  • Hole punch
  • 3.75mm crochet hook
  • Small amounts of any DK yarn of your choice (e.g chosen to match your wrapper)
  • Darning needle
How to make them:

Firstly take your cardboard, measure and cut out a 10cm by 10cm square. It doesn't matter what is on either side of the square as you won't see this when your coaster is finished.


Next take your chosen wrapper and place the cardboard square on top of the area of your wrapper you want to be shown on your coaster. Draw around the square.


Then remove the cardboard and place it to one side and cut out the shape from the wrapper, make sure you cut through both sides so you end up with two squares (one from the front of the wrapper and one from the back), both the same size as the cardboard.


Now glue one piece from the wrapper to one side of the cardboard square and the other to the other side. (You can use any glue just make sure it dries before continuing with the next step).


Now this is the tricky bit :/ Take your hole punch and punch 9 holes along each side of your square. (Corners are shared so there are 32 holes in total, see picture if confused)
I recommend you practice on a 10cm x 10cm piece of paper before trying it on your coaster.


After you have done that care fully snip off a little bit of each corner. This makes the corners easier to crochet around and gives them a more rounded finish :)
(It also stops the corners sticking out of your finished coaster!)


Next take your yarn and crochet hook and join the yarn to one of the holes (do this however you normally join on yarn). Do 2dc into each side hole and 4dc into each corner hole. When you get to where you started join with a slst and fasten off.


Finally darn in any loose ends and voila! you have your finished crisp packet coaster :D


The back even looks good too... :0)


Heeehehhee a coaster that gives you nutritional information too, that's impressive!

Abbreviations:
(I am using UK crochet abbreviations)
  • dc = Double crochet
  • slst = Slip stitch
I hope you like the tutorial, you could even make one as a gift using a wrapper from someones favourite food :)

See you all again sooooooonnn

Bye xxxxx :D

(P.S. please don't sell items made from this tutorial, if you want to for charity or another reason please contact me first, thanks xxx)

Thursday, 23 June 2011

Exams are finished! - Bring on the cake :P

Yolah!

TODAY I FINISHED MY GCSE EXAMS!!!!! WOOOOOOO HOOOOOOO!!!!! :D

It's been about 3 months of working every day, for hours :(  But now im freeeeeeeeeeeee! :3

As a celebration I thought I would post a free pattern, a cupcake pattern to be exact so you can all celebrate with me or make them to celebrate your own recent triumphs!

I made this pattern a while ago (and I blogged about it too). I like to call them roly poly cupcakes. They are a bit different because they don't have a knitted case, you serve them in paper cases:


You will need:
  • A pair of  3 ¼ mm needles
  • Light brown or dark brown DK yarn for the cake part (depending on whether you want chocolate or plain cake :P)
  • Blue, pink, yellow, white  etc... DK yarn for the icing
  • Red DK yarn for cherry
  • A handfull or so of stuffing
  • A darning needle
  • Some seed or bugle beads (or scraps of yarn) to sew on as sprinkles
  • Some cotton and a needle to sew on beads if using

Roly-Poly cupcake:

Cake:

Co 8sts in cake colour

Kfb into every st

P 1 row

*K1, kfb* repeat across row

P 1 row

*K3, Kfb* repeat across row

P 1 row

*K4, Kfb* repeat across row

P 1 row

*K5, Kfb* repeat across row

P 1 row

*K6, Kfb* repeat across row

P 1 row

*K7, Kfb* repeat across row

P 1 row

*K7, k2tog* repeat across row

P 1 row

*K6, k2tog* repeat across row

P 1 row

Change to icing colour:

*K5, k2tog* repeat across row

P 1 row

*K4, k2tog* repeat across row

P 1 row

*K3, k2tog* repeat across row

P 1 row

*K2, k2tog* repeat across row

P 1 row

*K1, k2tog* repeat across row

P 1 row

* k2tog* repeat across row

Cut yarn leaving long thread and thread through all sts on needle, draw up and fasten off.

Join seam to around halfway up cake, stuff, join the rest of seam and then gather up 8 cast on stitches (at bottom of cake) and fasten off, darn in end.
Cherry:

Using red yarn Co 7sts

Stst 6 rows (starting with a K row)

Cut yarn leaving long thread and gather up all sts on needle, draw up and fasten off. Draw up and fasten off all 7 cast on sts. Stuff and join seam of cherry. Sew onto top of cupcake along with chosen decoration.
Then serve :)

Abbreviations:

Co = Cast on

K = Knit

P = Purl


k2tog = Knit 2 stitches together

st(s) = stitch(es)

*    * = repeat what is in stars accross row

Stst = Stocking stitch

Kfb = Knit into the front and back of the stitch
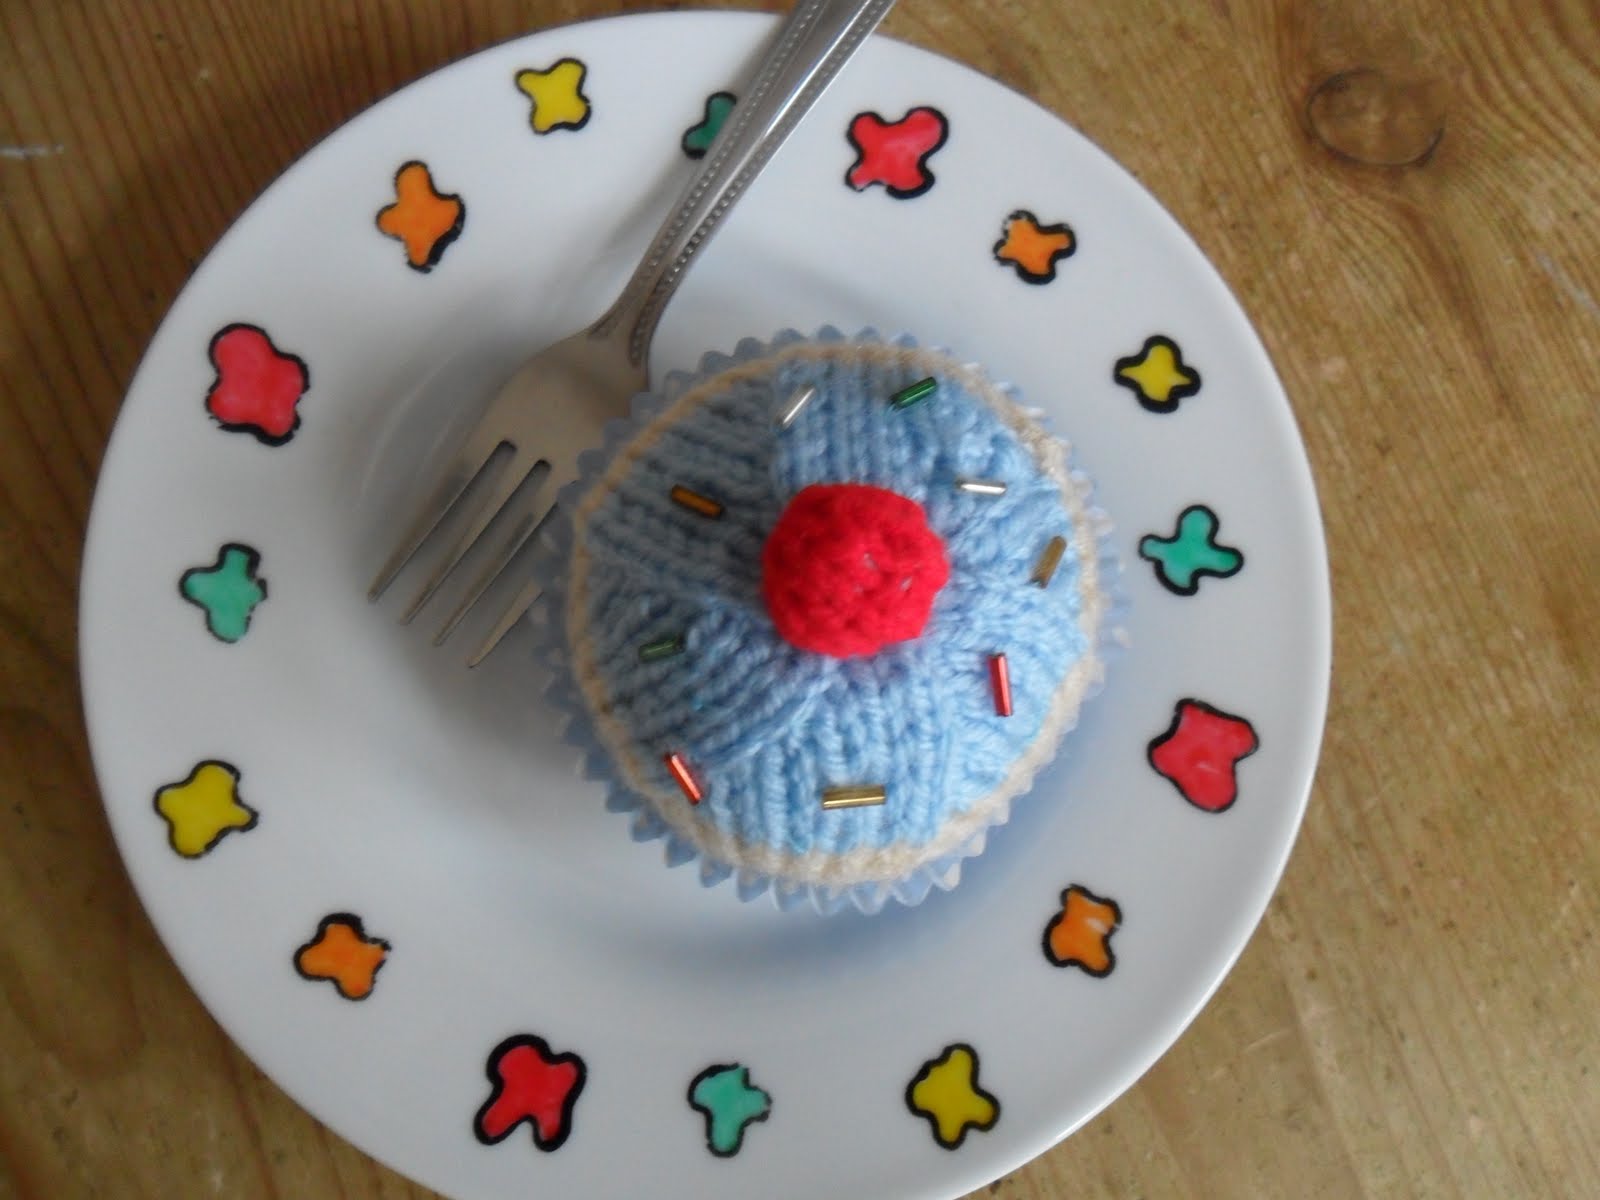

I hope you like the pattern, Im off now to go and PAAAAAARRRRRTTTTYYYYY  <*o*> woooo!

Bye xxx