Wednesday 28 January 2015

Fascinator Tutorial-Part 1!

Hello everyone,
 
As promised I am back today with part one of my fascinator tutorial! :)
 
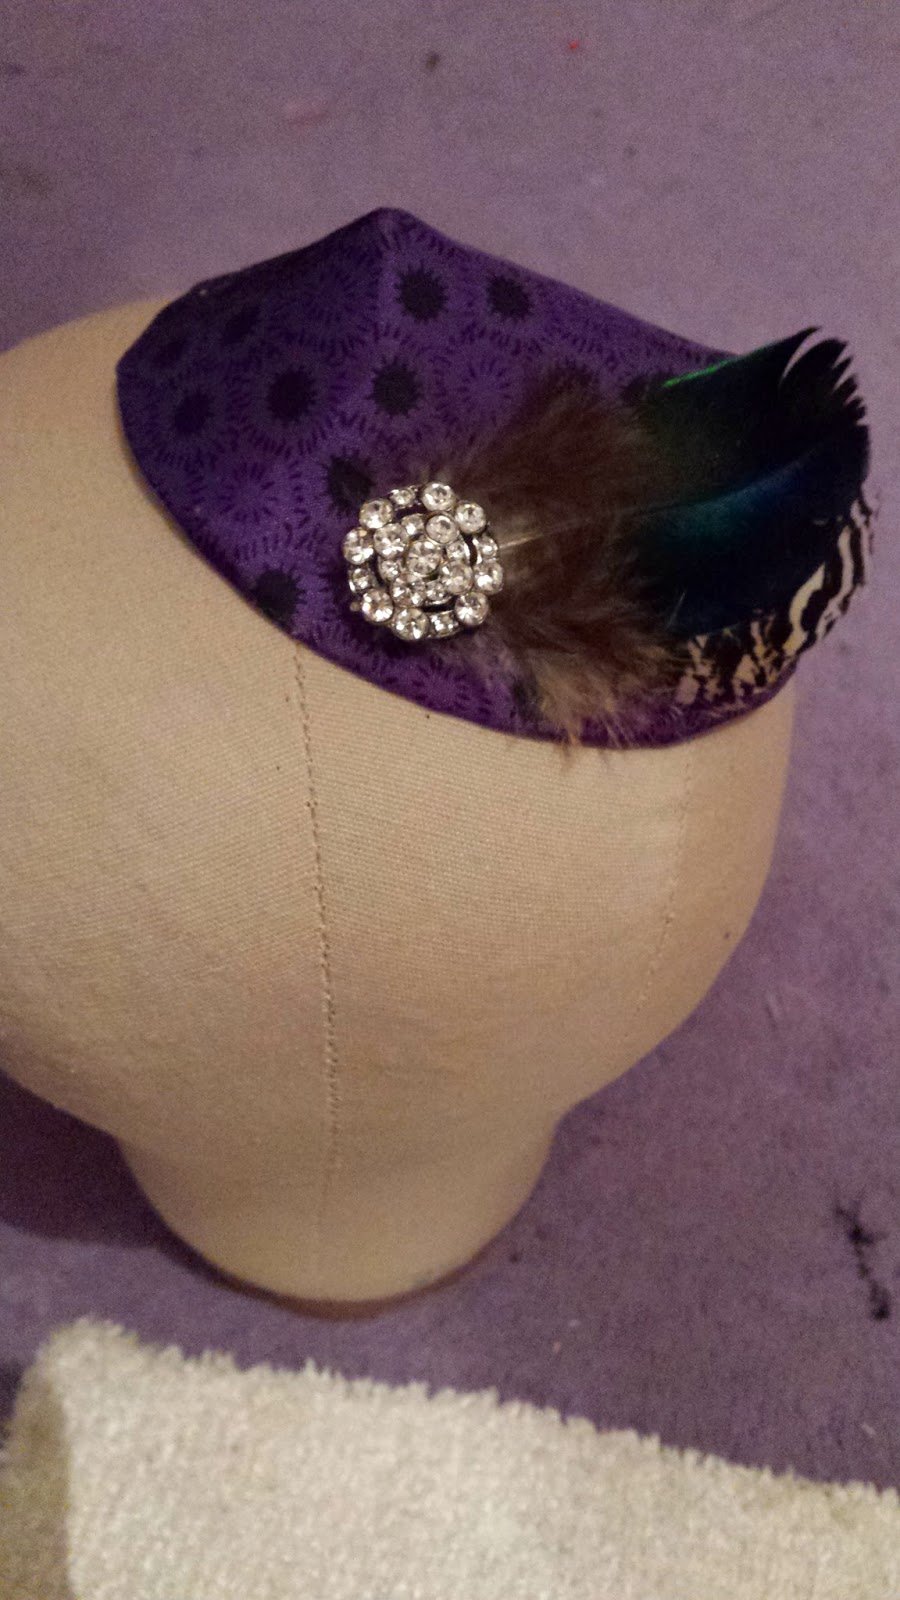
I gave you a nseak peak yesterday but here it is again, this is the fascinator shape/type Ill be working through with you:
 
 
This is a fascinator which has a buckram (a type of stiffened woven fabric) base though many fascinators are made completely from sinamay (the more traditional light more loosely woven stiffened fabric).
 
So here are a list of materials you will need:
 
- Some card or paper
- A pen/pencil
- A few pins
- Scissors
- A ruler
- Some buckram or other stiffened fabric for your hat base
- Some fabric of your choice for coating and lining your hat
- A length of millinery wire (or craft/DIY may suit the purpose- you can experiment with whatever you have :)
- Thread and a needle (some beeswax to pull your thread through is optional)
- Uhu glue , Copydex glue or Bostik multipurpose craft glue. All will do the job :P
- Some decoration of your choice e.g. feathers, brooches etc.
 
And now here is how to begin:
 
1. First it is good to draft up/drape your hat pattern in paper first. This shape of hat starts with an oval, which two darts are then taken out of, one either end, to create the final shape. You can go with any size oval you like but here is the piece I cut out with the dimensions written on it so you can follow this exactly if you wish, or draft up something similar:
 
 
2. Make sure you have cut up into the 5cm at either end as these are the places you will now be overlapping to work out the size of the darts you want to create your shape:


3. Try pinning and overlapping by different amounts until you are happy with the shape- but make sure the darts are both the same size (and that the overlaps run the same- towards the back) otherwise your hat could look lopsided :P There is no set measurement for the size of the darts- just whatever you think creates a nice shape! (I found 2cm worked well for me :).
 
4. But whatever works well make sure to take a pencil and mark where your overlaps run until so that when you undo your pattern, you will see the two pencil lines and can add 1.5cm seam allowance- the seam allowance tapers to nothing at the point of the dart though. If this sounds confusing hopefully the following picture of the final hat pattern will clear it up for you :):

 
5. Use your finalised pattern (above) to cut out your buckram base for your hat:

 
6. You can the take this piece and overlap the darts (by the 1.5 cm seam allowance) and the oversew them down using your needle and thread:

 
7. Next cut a length of millinery wire long enough to go around the base of your fascinator plus a few cm overlap.

 
8.  Then sew your wire just on the inside of your base using a blanket stitch. When you get back round to where the wire overlaps lay one end just under the other and work your blanket stitches closer together to hold the ends of the wire in place securely.

 
9. Your hat base should then look like this:

 
10. Next cut your outer fabric- you do this using the same pattern as you did for your hat base- but add 1.5cm all the way around it as seam allowance and don't cut out the sections for the darts!!! Just use tailors tacks or chalk etc.. to mark the ends and point of the darts so you know where to sew the darts!:


11. sew in the darts- on the wrong side of your fabric of course and then press them towards the back:

 
12. Then take your hat base and snugly fit your outer hat fabric covering over the top. It may seem a bit awkward or like it won't go at times but I assure you it will- you want a nice smooth snug fit- not bagginess! :P
 
13. Then take your Uhu (or other glue) and stick down your 1.5cm seam allowance all the way around the inside of your hat. Then leave it for a short while to dry of course :)


That is it for the first half of the tutorial but I will return shortly with the other half which covers decorating you hat and adding a lining and hair loops.... see you soon!
 
Bye xXxXx
 
P.s. if you have any questions about any of the materials, stages or things that seem unclear I will be happy to answer or try to explain as best as I can :)
 
Bye xxx


Tuesday 27 January 2015

Fascinator post update...

Hello everyone,

Just to say the first half of my fascinator tutorial I have been teasing you all with is coming tomorrow evening!
 
Here is a sneaky peak of what ill be showing you how to make- but you can of course experiment with your own colours and decoration:

 
See you all verrry soon!
 
I hope you are all safe and well :) xxx
 
Bye xxx

Thursday 22 January 2015

Victorian Dress half scale

Hello everyone,

It has been too long since my last post- time has been flying now I'm back at college! Especially since I have been so focused on making progress in our latest on going project making one of the dresses from Janet Arnold's Patterns of Fashion Books. I chose to make a Victorian promenade ensemble (from book 2). I scaled up my patterns from the tiny ones in the book and then went fabric shopping to try and find materials close to the original materials used. After that I did a bit of toiling and have now begun making up. I have finished my sleeves completely- they took 3 days by themselves- so much hand sewing due to pieces being so small you cant really do them under the machine practically.

Here is the original Victorian dress, the image is from the V and A website where the garment is held in the archives:

 
And here are my kind of replica half scale sleeves:

 
I am quite proud of them :) Now I just need to get on and make the rest of the ensemble... in between starting on my first make for a show production which starts next week! :D Ahhh, Yayaya I'm very excited about that!!! (can you tell!? haha)
 
Also soon I will be bringing you all a mini fascinator tutorial upon suggestion by one of my lovely readers Mel makes! So look out for that :)
 
Speak to you all again soon and I hope you are all super well,
 
Bye XxXxXxX
 

Monday 12 January 2015

More hattery :)

Hello everyone,
 
I hope your first few weeks of 2015 have been as fun and amazing as you wish the year to continue :)
 
I am now back at college, so back to more a bit more (mostly enjoyable :P) hecticness. Which Is why I was glad I made some more progress on my blue Hat I started on new years- before I had to hit the books again :P
 
I managed to get the lace pieces sewn on that I chose as my decoration:


You may recognise the lace motifs... they are from one of the dresses I picked up from the costume store sale a while ago :P I really like the pattern of the lace and have found so many things so far that it compliments, including the blue velvety fabric of this hat (which is actually from a spare curtain :P).
 
I also managed to squeeze in the time to make this little fascinator of my own design:


The main fabric coating this fascinator was another of my costume store bargains- they have all come in so useful! The leopard print fabric was from a shirt I didn't really need any more and I got the little metal charms when I was in the IOW one time. It was fun designing my first fascinator- From materials and a shape which seemed quite crazy it came out with the sophisticated but quirky factor I was aiming for I think :P I am happy... now I just need an event to wear it to! Haha :-)
 
Speak to you all again soon,
 
Bye XxXxX

Saturday 3 January 2015

Hatty, sorry I mean Happy New year!

Hello everyone!

I hope the first few days of 2015 have been as fabulous as you mean for them to go on! :)
I Haven't made lots of resolutions this year, just 2 main ones. To develop my skills as a costumier further and do well on my course and to keep working on becoming a better, happier and more positive person to be around. They will keep me busy enough for the year I think though!

I have started the first one off with a bang by getting to work and using some of the millinery materials I got for christmas on starting to make a new hat.  It is inspired by a 1950s style fashion interpretation of a sailors hat.

First I modelled it in card to check fit and proportion /look:


After posing round the house in my cardboard model I then got onto cutting out the buckram pieces, attaching the wire Around the crown and the brim, coating all the pieces in fabric using glue as necessary... which left me a bit messy :p And now after several hours of hand sewing I am on the verge of having a completed hat! Look:


Just lining, inside petersham band, hair loops and a bit of decoration if I choose so :)

Haha hat making is very addictive. I want to make a bonnet next!

I'm off to bed now so I can finish my hat in the morning... possibly running into the afternoon :p

Speak to you all again soon!  And once again Happy new year my friends!

Bye xxx